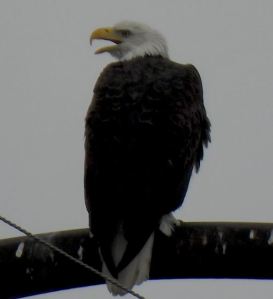
Our 2nd Bald Eagle in four months: Caught in mid-call atop a power tower 200 yards north of our lake on a cloudy February 15
Winter Wonders: From “Snowcrete” to Bomb Cyclone to….
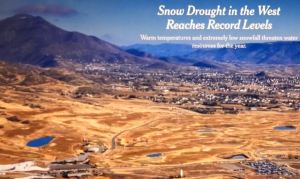
Climate Log: Snow Drought in the West, and the Clock Is Ticking for the Winter Olympics
Our Stay-Cozy Kitchen: Our Take on a Mexican Specialty
The February Photo/Video Gallery: Scenes from Our “Great Backyard Bird Count” and Winter Wonderland
****************************************************************************
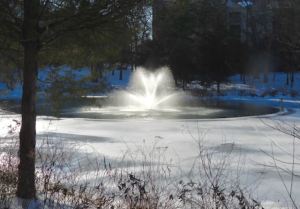
The fountain pool in the middle of our small lake surrounded by ice, very cold February 13
So Much to Wonder this Winter
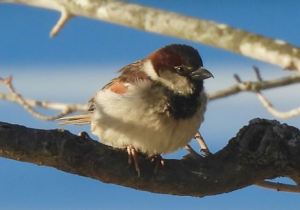
One of our ubiquitous House Sparrows makes a colorful fashion statement beside the frozen lake, February 13
Chris: This has been a “wonder”-ful February. But not in a predictably wintry way. Let’s count a few of the strange happenings we’re wondering about.
1. Snowcrete. Here, in our tiny mid-Atlantic sliver of the U.S., we’ve been treated to a frozen phenomenon we’d not encountered before. It’s called “snowcrete,” On January 25, 5-7 inches of snow fell here in Northern Virginia, and the snow was immediately covered by an inch or so of ice. For the next two weeks, the temps stayed below freezing, so not only didn’t the snow melt, but it had somehow mixed so thoroughly with the ice that it was like concrete–impossible to shovel. It looked like beautifully polished marble and was just as durable. Schools were closed for more than a week, and many vehicles were not extricated for three.
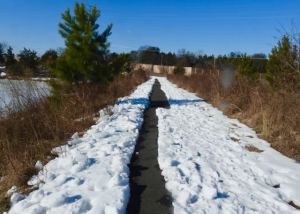
Three weeks after the snow/ice of Jan. 25, and after 3 days of higher temps, a narrow path was finally shovel-able through the snowcrete along the top of the dam, February 13
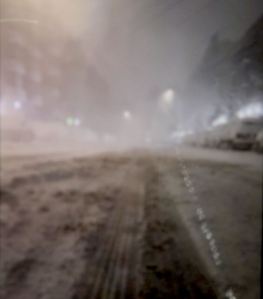
2. Bomb Cyclone in the Northeast Snowcrete is one wonder, but the “Bomb Cyclone” still dumping snow from Philadelphia to Maine is in another category, because it’s not exhausted yet. As much as 38 inches of snow in Rhode Island. And here’s a shot sent to us on February 23 by our relatives on an evening in usually hoppin’ Brooklyn:
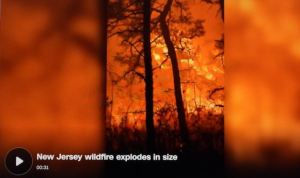
3. High Temps, No Snow, and Wildfires in the Plains. In a parallel universe that is also part of the U.S., high temp records and drought records are being set in the Mountain West and the Plains states. As of February 20, at least 12 wildfires have been burning in the region, and there’s been no snow over close to half of the U.S. (See the Climate Log of the blog for more on the drought.)
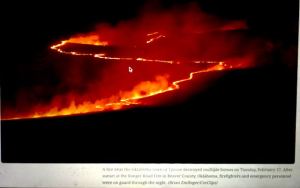
The Ranger Road wildfire near Tyrone, Oklahoma, has burned almost 300,000 acres close to where the borders of Texas, New Mexico, Oklahoma, Kansas, and Colorado meet, February 17 (CNN photo)
The wildfires in the Plains States set another record for February, affecting states from Texas to Colorado to Oklahoma to Kansas to New Mexico, with no relief in sight as the drought and “red flag’ warnings continue.
4. Another Wonder: Where is the President? In what may be another parallel universe, the current President, who ran on the promise of “America First” instead of involvement in foreign entanglements, continues to ignore the ongoing economic and environmental suffering of American citizens. These two weeks, he gave his attention to
- (1) threatening a military invasion of Iran and
- (2) creating a so-called “Board of Peace,” to which dictators from around the world have been invited to join if each pays a $1 billion dollar entrance fee. The purpose of this Board of Peace is… anyone’s guess, though the President’s collecting those entrance fees might just be the real purpose.
To be fair, some of this President’s attention is going to issues affecting US citizens. Here’s one:
- He instructed his Environmental Protection Agency (EPA) this month to kill the last remaining environmental protection.
Called the “endangerment finding,” this rule requires the agency to seek out, investigate, and address any event or practice–such as air and water pollution by chemicals and nano-plastics–that “endangers the health and safety of Americans” (Lisa Friedman, “Trump Administration Erases the Government’s Power to Fight Climate Change,” New York Times, February 12). Now that the President has killed this last environmental guardrail, it’s not likely, for example, that those millions of citizens suffering from those wildfires and long-term droughts will be getting any federal help or even investigation of the causes.
*******************************************************************************************
Climate Log: Snow Drought in the West, and the Clock Is Ticking against the Winter Olympics
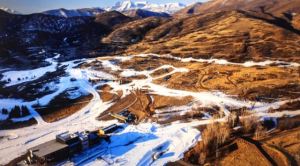
Soldier Hollow Nordic Center, near Salt Lake City, Utah, where the 2002 Winter Olympics were held and where the 2034 Games are scheduled. Just .1 inch of snow fell this January (Matthew Hamon photo)
“In just 25 years, dozens of places will be too warm to host the Winter Olympics”–Laura Paddison, CNN, February 10
“While record snowfall and single-digit temperatures pummel much of the United States, an extreme snow drought and unusually warm weather are keeping skiers off the mountains, snowmobilers off the trails and water out of the rivers across much of the West.” (Jim Robbins, New York Times, February 2)
During our years in California, one issue that stayed in the news was the steady decline in the water levels in the Colorado River, which feeds seven Western states and part of northern Mexico. A vicious combination of
- rising temps,
- falling rain levels,
- decreasing snowpack, and
- over-pumping of groundwater for agriculture
was making the water future ever more dire. One “solution”–taking many square miles of land out of cultivation –was having only marginal effect.
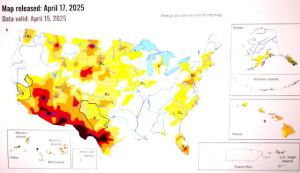
But while we in California (the largest user of Colorado River water) were focused on what we might do to improve the situation, we paid little attention to how drought was getting more and more serious in the upper basin states: Colorado, Utah, Wyoming, and New Mexico (see map below):

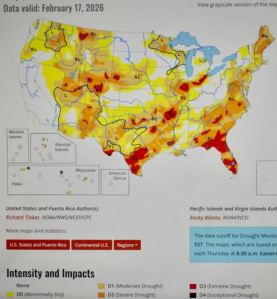
You may note that severe and extreme droughts are ongoing in most of the US–even in the East, where the current snowstorms are grabbing the headlines. But this wintry weather just obscures–for the moment–the fact that the climate trend almost everywhere is both warmer and much drier (see Florida, for example, on the map).
Future of the Winter Games? Strangely, attention on drought in the U.S. West this month is mostly because of the worldwide phenomenon of the Winter Olympics, which just concluded in the Italian Alps. If they were paying attention, TV viewers could see the sharp contrast between the snow-covered skiing and cross-country courses and the largely snowless mountains beyond. Commentators did not focus on the fact that the “snow” on the courses was mostly manufactured (like the ice in the arenas), but the athletes knew. Some of them, like U.S. Olympic gold medalist Jessie Diggins (photo below), spoke up in her blog about what the conditions would mean for the future of U.S. and international ski events, with the next scheduled Winter Olympics in France (2030) and in the U.S. (Utah) in 2034:
I’ve traveled all over the world on the World Cup circuit and I’ve seen the effects of climate change everywhere. Mountain towns that used to thrive on ski tourism are struggling through Decembers with no natural snow. Ski shop owners are extremely worried about the declining snowsports economy and the impact that it will have on their jobs. Most of the time these days our race courses are just dirty ribbons of man-made snow cut through brown grass. You can’t even think about hosting a World Cup race without having snow-making capabilities. Think about that for a second. You can’t host a winter sporting event…without fake snow. (Protect Our Winters. org–Jessie Diggins, With a Medal in My Pocket)

*********************************************************************************

Jean’s Baked Chicken in Mole right from the oven
Our Stay-Cozy-Winter Kitchen: Jean’s Take on Mexican “Mo-le”
Jean: We weren’t planning to travel to Mexico or revisit California right now, but I felt the need in this snowy winter to make a quintessentially Mexican dish. Not tacos or tamales, but mole (pronounced moe-lay). We had it once at Rick Bayless’s restaurant in Chicago, Topolobampo. See the website here: https://topolochicago.com/topolo-menus/bienvenidos-a-oaxaca/

Serving of Jean’s Baked Chicken Mole and Her Corn-Bread Pudding
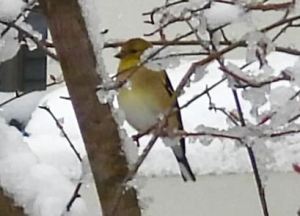
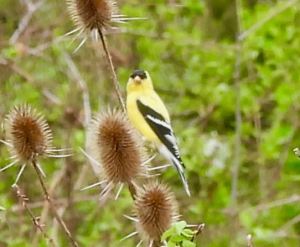
One of our typical birds in the Great Backyard Bird Count is the American Goldfinch, seen here in our Serviceberry tree just after our latest snowfall, February 23
The February 2026 Photo/Video Gallery: The Annual “Great Backyard Bird Count” and Scenes of the Season
Chris: This month’s gallery features snowy winter scenes and some of the many tough critters, like the Goldfinch (above), who make it through the sub-freezing times of the real winter we had this February. This year’s Great Backyard Bird Count (Feb. 13-16) saw, as of February 19,
- 1,590,167 submissions (through Merlin and eBird apps)
- 1 million people participated around the world
- 186,839 Macaulay Library photos, sounds, and videos
- 8,119 bird species identified, and
- 435 community birding events
The bird pics you see here are among those I submitted in my own list. Further submissions by participants will be accepted through March 1.
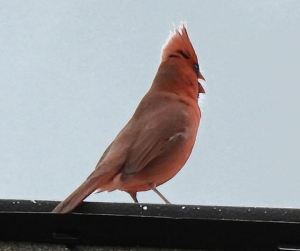
Male Cardinal munches seeds at a neighbor’s feeder, southeast of lake, cloudy, cool February 21
Panorama toward north in snow, with Cherry Laurel in foreground, February 23
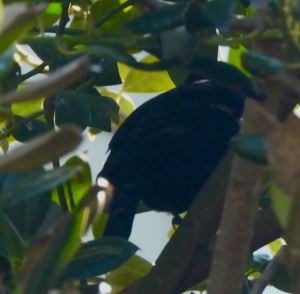
Deep within this Chinese Holly hides Red-winged Blackbird, very early this year and one of three triangulating their distinctive calls on the southeast bank of the lakeside, February 27
Savannah Sparrow, uncommon visitor, atop the fence near our garden plot, warm February 26
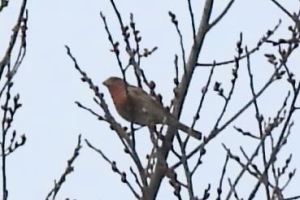
House Finch male in Slippery Elm, southeast shore, cloudy, cool. February 16
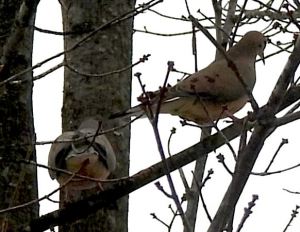
Pair of Mourning Doves in Red Maple, southeast bank, rainy February 15
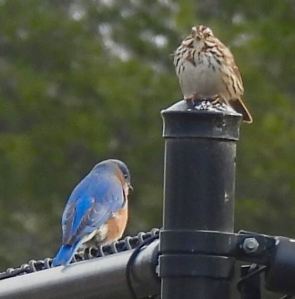
Surprising pair: Eastern Bluebird and Song Sparrow atop fence surrounding our garden plot, warm February 26
Male Cardinal calls melodiously in Red Maple, southeast side, warm February 25
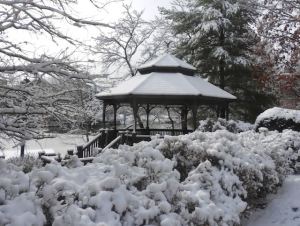
Gazebo on west shore with “snow bloom” azaleas, February 23
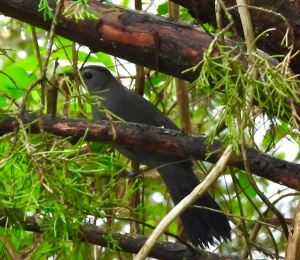
Mockingbird preens in Persimmom on the southeast shore in the rain, February 20
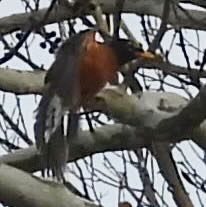
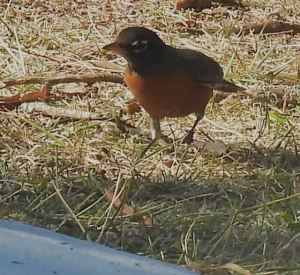
American Robin about to take flight from Sycamore near our garden plot, warm February 26
Downy Woodpecker hammers Sycamore above the inlet stream, rainy February 15
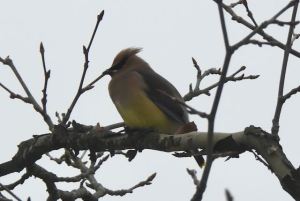
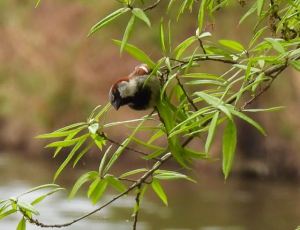
Visiting Cedar Waxwing perches in a Sycamore in the southeast cove, on a cloudy, cool February 16
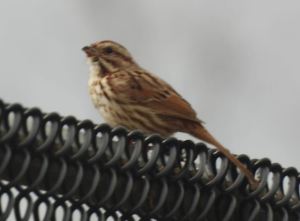
On the fence by our ice-bound garden plot, Song Sparrow calls, February 19
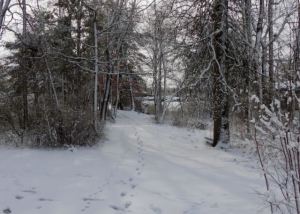
Animal tracks on path in woods through new snow east of the lake, February 23
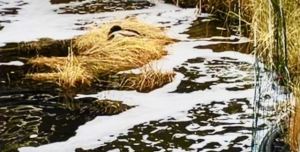
Pair of Hooded Mergansers, rare visitors here, stop briefly at our lake on their way north, snowy February 23
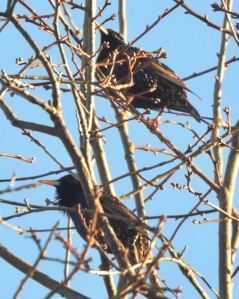
European Starling pair in Slippery Elm, east side, warm February 21
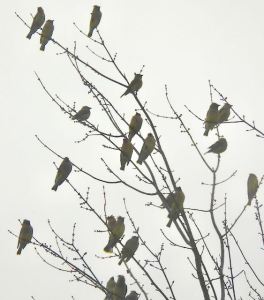
Large flock of migrating Cedar Waxwings rests briefly atop a Red Maple, southeast shore, February 20
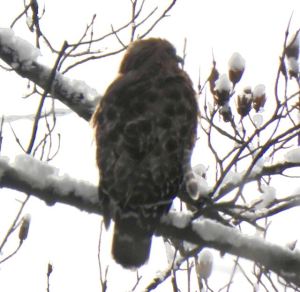
Red-shouldered Hawk in an early-budding Tulip tree decorated by new snow, east of lake, February 23
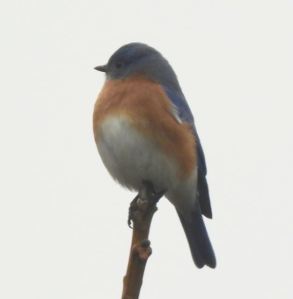
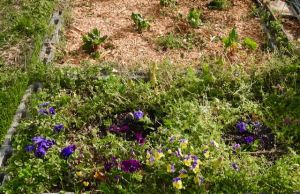
Our garden plot was covered in “snowcrete” for 3 weeks, but friends like this Bluebird stayed vigilant, February 19
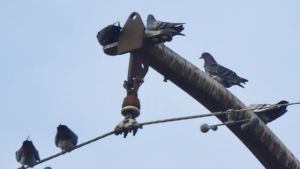
Rock Doves converse atop power tower west of the lake, February 25
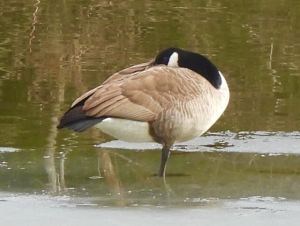
Canada Goose rests on one leg in mid lake, warm February 21
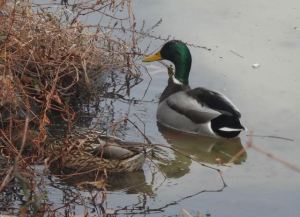
Mating pair of Mallards at the their nest by the inlet stream of the southwest cove, February 16
Blue Jay chorus (cacophony?) in Scarlet Oak, southeast of lake, February 3
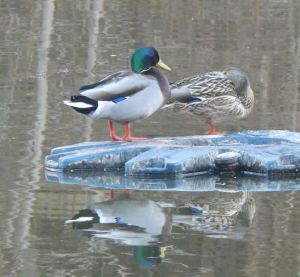
Mallard pair resting on the fountain base in mid-lake, February 21
At nearby Claude Moore County Park, American Robin feeds in the grass by a snowbank, February 14
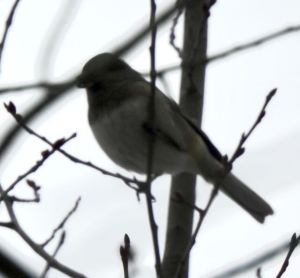
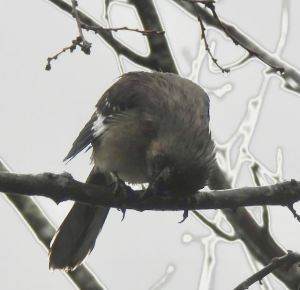
Dark-eyed Junco in Serviceberry, southeast side, February 15
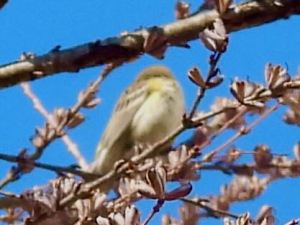
Pine Warbler, uncommon visitor here, in Katsura tree, south of lake, very cold February 13
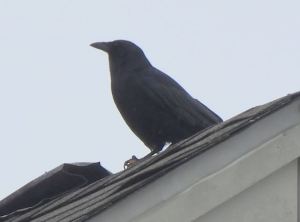
Fish Crow on roof in community, February 15
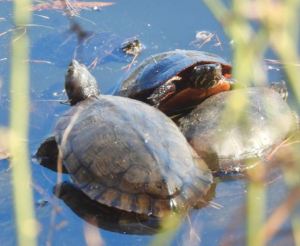
On February 28, the last day of the month and the warmest day so far this year, 4 Red-Bellied Cooters–our first turtles of the year–scrum together along the west shore
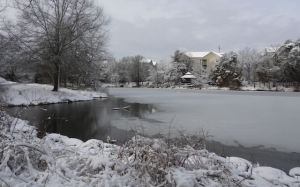
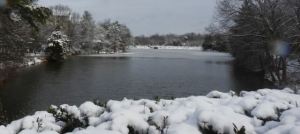
View of the western shore of our lake after our most recent snowfall, February 23
And on to Marvelous March, with hopes for more wonders…


 Written June 24, 2011 (addition August 2016 below)